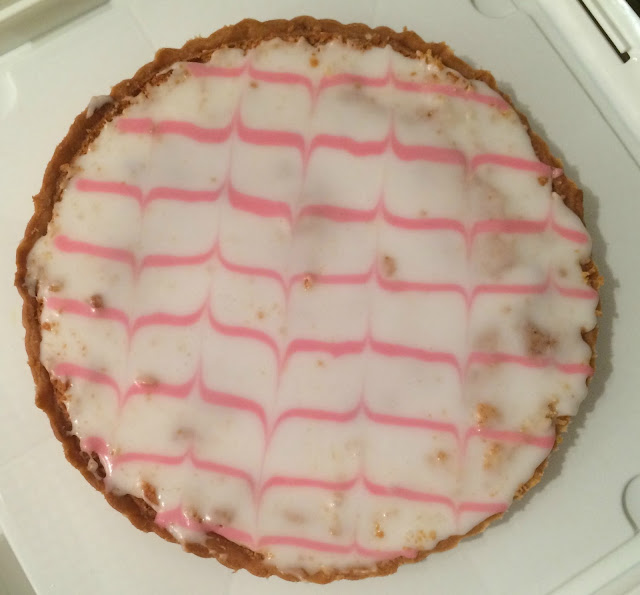
 |
| My finished tart! |
Showing posts with label Baking. Show all posts
Showing posts with label Baking. Show all posts
The Great Bloggers Bake Off - Week Five - Mary Berry's Bakewell Tart
Monday, 26 September 2016

The Great Bloggers Bake Off - Week Four: Cinnamon Sugar Churros
Monday, 19 September 2016
 |
| Cinnamon Sugar Churros w/ Plain Chocolate Dipping Sauce |

The Great Bloggers Bake Off - Week Three: Nutella Star Bread
Sunday, 11 September 2016
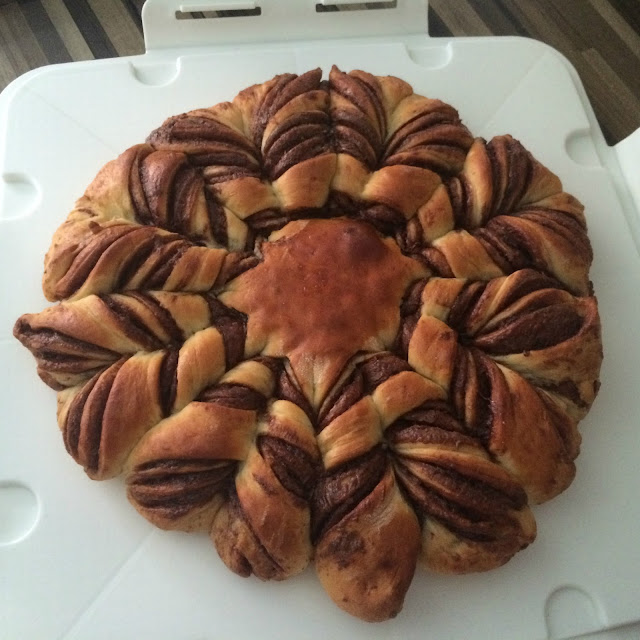 |
| Nutella Star Bread |

The Great Bloggers Bake Off: Week Two - Galaxy Iced Biscuits
Saturday, 3 September 2016
 |
| Galaxy Iced Biscuits |

The Great Bloggers Bake Off: Week One - Mirror Glaze Cake
Monday, 29 August 2016
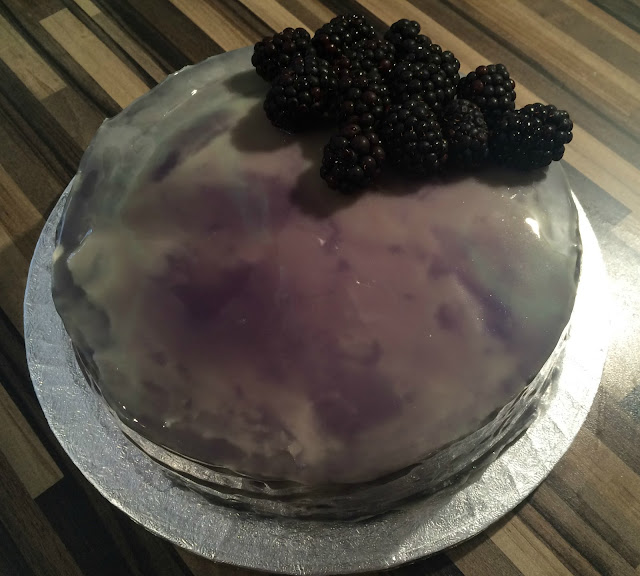 |
| Blackberry Mirror Glaze Cake |
As always the GBBO started with Cake week, and the challenges were a signature drizzle cake, the technical was Jaffa Cakes, and finally the show stopper was the absolutely beautiful mirror glaze cake. I'm sure by the title you've already realised that I decided to make the mirror glaze cake, which turned out to be not as difficult as you would imagine... So if you would like to know how to make this cake then keep reading...

The Great Bloggers Bake Off 2016!
Tuesday, 23 August 2016
 |
| via |

Easter Hot Cross Buns!
Sunday, 27 March 2016
 |
| Yummy Hot Cross Buns! |

Creme Egg Brownies
Friday, 18 March 2016
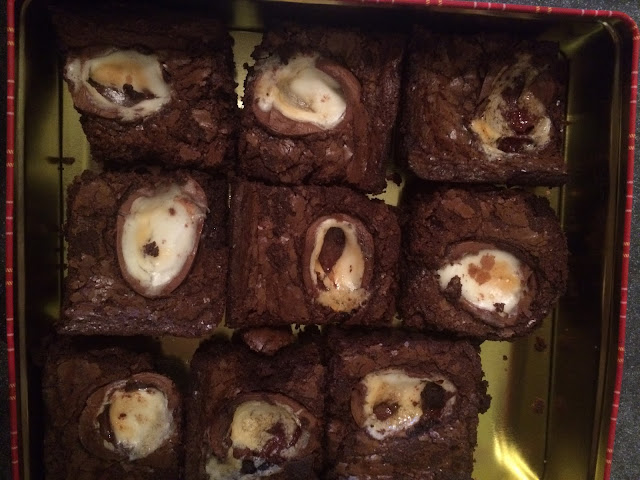 |
| Finished Creme Egg Brownies |

Creme Egg Bark
Friday, 11 March 2016
 |
| Creme Egg Bark |


Cream Egg Cheesecake
Sunday, 6 March 2016
 |
| Yummy Creme Egg Cheesecake |


Triple Chocolate Mug Cake
Friday, 26 February 2016
 |
| Delicious triple chocolate mug cake |
This week I didn't have as much time for baking as I would have liked, but I still wanted to share a recipe with you, so I chose to make a mug cake. Mug cakes are quick and easy to make, and can usually be made with a few simple ingredients that you should have in your cupboard.


Super Simple Shortbread Biscuits
Thursday, 18 February 2016
Welcome back to baking on my blog! I'm hoping that this will once again become a weekly feature, seeing as everyone seems to enjoy reading these kinds of posts, and of course I absolutely love creating them. This week I decided to do something simple, and delicious, Shortbread!

Valentines Red Velvet Cheesecake Brownies
Friday, 12 February 2016
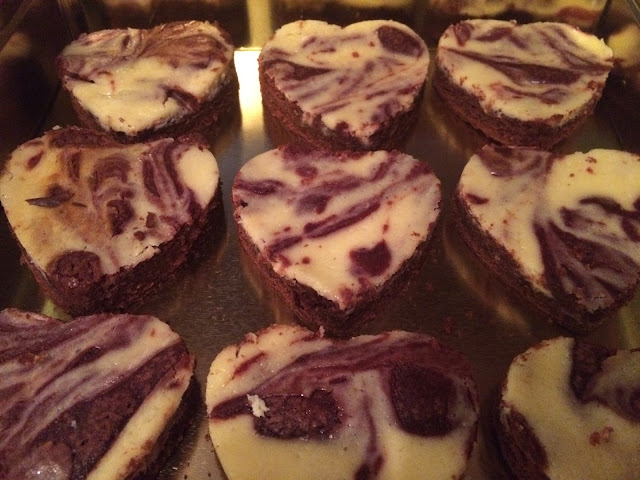 |
| Beautiful marble effect heart brownies |
It's about time that I got back into baking on this blog, and what better time to start than Valentines Day? I saw this recipe for some beautiful heart shaped Red Velvet Cheesecake Brownies from Kawaiisweetworld on Youtube, and I knew that I had to give them a go. I will admit that I'm not 100% that I got the cheesecake part of this recipe right, but I'll get to that in a minute. You will also require Cup Measures for this particular recipe.
 |
| Ingredients needed for the recipe. |
Ingredients for the Brownie:
- 1 Cup Caster Sugar
- 1 tsp Vanilla Extract
- 1/4 Cup Cocoa Powder
- 1 Stick of Unsalted Butter (113g)
- Pinch of Salt
- Red food Colouring (measurements mentioned below)
- 2 Eggs
- 3/4 Cup of Plain Flour
Ingredints for the Cheesecake:
- 8oz Cream Cheese
- 1/4 Cup of Caster Sugar
- 1/2 tsp Vanilla Extract
- 1 Egg
Special Equipment:
- Cup Measures
- 8" x 8" pan: the one I used was about 8" x 11" so don't worry too much if the one you have is a little bigger
- Heart shaped cutter
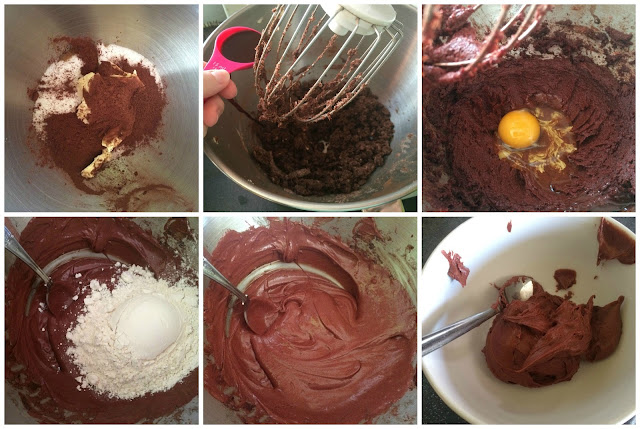 |
| Brownie making steps. |
We start by preheating the oven to 170 degrees Fan (190 degress/Gas mark 5). Whilst the oven is preheating you will need to grease your tin, for which I used some of the extra butter I had. I then lined the tin with greaseproof paper, which will assist in removing the brownies later.
To get started with the mix, first combine the butter, sugar, vanilla extract, and salt in a bowl, giving them a good mix. Next we add the red food colouring and this is where some guessing work comes in. The recipe I used states to use either 1 tsp of gel food colouring, OR 1 tbsp of liquid colouring. I used a cheap Tesco liquid food colour, and as such ended up using almost 3 tbsp of the food colouring. This is completely up to you, and your own discretion, add colouring until you are happy with the red colour you have gotten with your brownie mix. Once you are happy with the colour, you add your eggs one by one, giving a good mix in between each addition. The last thing to add is the flour, and just mix until completely combined. Then what you want to do is keep back about 1/3 cup of your mixture in a separate bowl for later, this is what we will use for the marbling effect.
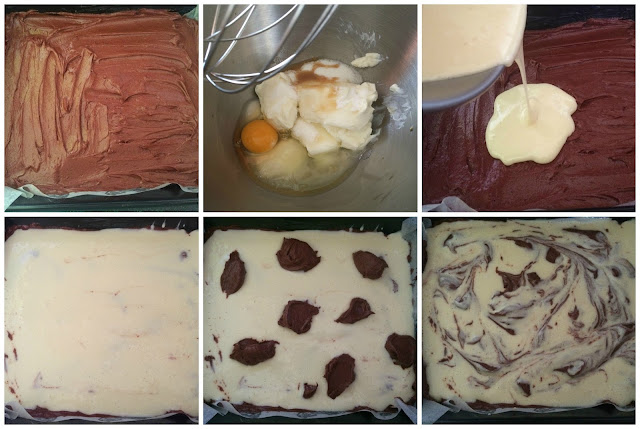 |
| Cheesecake steps, and brownie assembly. |
I poured the cheesecake mixture over the top of the brownie in the tin, and then smoothed it out over the mixture, making sure it was completely covered. This is when you bring back the mixture that you held back earlier. To make the marble design you simply need to blob the mixture all over the top of the cheesecake then run a knife through it to swirl it around. This was quite difficult as my cheesecake mixture was so runny, I think if the cheesecake mixture was thicker it would have been so much easier.
Then they went off into the oven for 30 minutes. Once they were baked I removed them from the oven and allowed them to cool completely in the tin. The final step once cool, was to cut out my heart shapes. The recipe on the Youtube video states that it should make around 11 heart shaped brownies, I managed to cut 9 out of mine. I think this completely depends on the size of your cookie cutter, I went for a medium sized brownie, but had I made them slightly smaller I think I could have gotten the 11 she mentions in the recipe.

Chocolate Chip Cookie Cupcakes
Thursday, 26 November 2015
I recently subscribed to a Magazine called Food Heaven, but then received a notification from them to say I will not receive my first issue of the magazine until February! I decided I couldn't wait until then because I wanted some inspiration for my Christmas baking, so I went out and grabbed the latest issue of Cupcake Heaven as I definitely do not bake enough cupcakes. Flicking through I immediately found this recipe and knew I had to try it out for myself. So as well as making cupcake batter for this recipe you also have to make cookie dough! To make 12 cupcakes you will need...
For the Cookie Dough:
- 100g Unsalted butter
- 75g Caster Sugar
- 1 medium egg
- 1 tsp Caramel flavour
- 125g Plain Flour
-1 tsp baking powder
- 100g Dark chocolate chips
For the Cupcake Batter:
- 150g Unsalted Butter
- 150g Caster Sugar
1 tsp Vanilla extract
- 3 medium eggs
- 150g Plain flour
25g Cocoa powder
2tsp Baking powder
For Decorating:
- 150g Unsalted butter
- 275g Icing sugar
- 1 tsp Vanilla extract
So you want to start off by making the cookie dough, which is not only used for little cookies on the top but also inside the cupcakes! So to make the cookie dough you need to beat together the butter and sugar until creamy, beat in the egg and caramel flavour, and then sift in the flour and baking powder, finally adding the chocolate chips and then combining this with your hands until you form a dough.
Weigh out 200g of cookie dough and make 12 cookie dough balls, which then need to chill in the fridge until you have made the cake batter.
Then make the remaining cookie dough into mini cookies, you can make as many of these as possible, but you need at least 12 for the top of the cupcakes, which you can then also chill. Next you need to preheat your oven to 180C/Gas Mark 4 and line a muffin tin with 12 cupcake cases. Then you are all ready to make your cupcake batter which is as simple as throwing all the ingredients into the bowl and mix together until well blended.
Next comes a bit of a time consuming part, which starts with filling up the cupcake cases half way, then adding the chilled cookie dough ball, before finally filling up the cupcake cases. These need to be popped in the oven for 22-24 minutes. (mine took double this amount of time but I think that was down to the oven I was using being rubbish and old). Once the top of the cupcakes is hard to the touch then they are ready to go! As soon as these are out of the oven turn it up to 190C/Gas Mark 5 and put your mini cookies in for 10-12 minutes until golden. They may still be a little soft when you get them out but they will harden as they cool.
Once everything is cool you can go ahead and make your butter cream icing by mixing together the butter, icing sugar and vanilla extract. I used the back of a teaspoon to spread on my buttercream icing and I like the fact that it looks kind of messy, almost like whipped cream. Then I cut each mini cookie in half and placed it onto the cupcake like butterfly wings, and finally I placed chocolate chips on top of that. There you have it folks, cookie filled chocolate cupcakes that are sure to impress everyone this holiday season, I'm sure you could even exchange the cookies for gingerbread for the same effect!
Let me know in the comments what you have been baking recently, I would love to know?

Baby Brothers Birthday Cake
Thursday, 12 November 2015
It seems now my passion for baking has returned that I am now forever doomed to be the family Birthday Cake maker, as not two weeks after making a cake for my nan, it was my brothers birthday, and I was asked once again to bake for the occasion. I did ask my brother what kind of cake he wanted hoping he would come up with an idea for a design but his answer was simply, chocolate cake. Believe it or not when I was a kid I wasn't a big fan of cake, unless it was a fruit cake (weird I know), and even to this day, whilst I have grown to love cake I am not a big fan of chocolate cake! So feeling rather uninspired I googled chocolate cake and found this recipe from Good Housekeeping which I thought looked nice, and then I just had to tackle some form of decoration. So I decided to trawl Pinterest, and after typing in Chocolate Cake I found my inspiration cake!
Courtesy of bakingmad.com
The recipe for this cake required the following ingredients:
For the Cake:
225g Unsalted Butter
225g Plain Chocolate
450g Caster Sugar
175ml Milk
4 Medium Eggs
150ml Sour Cream
250g Plain Flour
1 1/2 tsp Baking Powder
40g Cocoa Powder
For the Icing:
200g Plain Chocolate
50ml Double Cream
40g Golden Syrup
200g Unsalted Butter
250g Icing Sugar
50ml Double Cream
40g Golden Syrup
200g Unsalted Butter
250g Icing Sugar
For the Decoration:
2 boxes of milk chocolate fingers
2 boxes of white chocolate fingers
5 'share bags' of your favourite treats (I used, Malteasers, Milky Bar Buttons, Magic Stars, Revels, and Mars Mix)
2 boxes of white chocolate fingers
5 'share bags' of your favourite treats (I used, Malteasers, Milky Bar Buttons, Magic Stars, Revels, and Mars Mix)
I started by making the cake mix, which first involved melting the butter, sugar, chocolate and milk in a pan until smooth. Once this was done I left this to cool completely before moving to the next step. Once the chocolate mixture was cool I mixed in the eggs and sour cream using a stand mixer, until combined. Finally adding the flour, cocoa powder and baking powder and giving it a final mix. This then went into my prepared tin and then sat in the oven for 1 hour and 45 minutes, which felt like forever...
Once the cake was out of the oven and cooling I moved on to the icing. This involved melting togther more chocolate, cream and golden syrup until smooth, again leaving this to cool. Then I moved onto making a buttercream by whisking together softened butter and caster sugar. Once this was done I combine the chocolate and buttercream mixtures, and then set this aside to set until the cake was completely cool. Once the cake was cool I carefully levelled the top, and then cut the cake in half horizontally to give two layers. These were sandwiched together by some of the icing, which I then used to cover the rest of the cake. Before the icing had a chance to set I lined the outer edge with the chocolate fingers alternating between milk and white chocolate. The final step was to place the different kinds of chocolate on top of the cake, which I had far too much fun doing... I actually think more chocolate went into my mouth, than on the cake, but that's one of the perks of baking!
Here is the finished result, which I think looks great. I cannot stress enough how easy this cake was to make and decorate, so if you see this and would like to have a go, please don't be put off! This would be the perfect cake to impress friends and family with because who (other than me) doesn't like chocolate cake?
Have you baked anything this week, leave a link in the comments so I can have a nosey!

Wishlist Wednesday: Baking Tools
Wednesday, 11 November 2015
If you have been following my blog over the last few months then you will know that my love of baking has been reignited and is really taking off. That said, I thought this weeks wishlist Wednesday should be dedicated to the items that I am still lacking in my collection!
1. Mary Berry Cake Lifter: £11.99
2. Wilton Rolling Tool Caddy: £110
3. Cream Cupcake Caddy: £10
4. Wilton Angled Icing Spatula: £5
5. Glass Dome Cake Stand: £10
6. Wilton Cooling Rack 3 Pack: £8
7. Wilton Icing Colour Set: £10
8. Cake Decorating Turntable: £13.50
9. Wilton Pops Decorating Stand: £4
Let me know in the comments what is featuring in your wishlist this week!

Bonfire Night Cupcakes
Thursday, 5 November 2015
Seeing as I didn't really get around to doing some proper Halloween baking, I thought I would make some Bonfire Night Cupcakes instead. I saw this Pumpkin spiced cupcake recipe on Zoella's channel and thought it sounded pretty good, so I decided to give it a go. It turns out she got the recipe from Allrecipes.co.uk originally, so I decided to follow their version. However instead of making a cream cheese frosting I decided to go with buttercream, as I knew I wanted my icing to have height so it could resemble a bonfire, and I know from experience that cream cheese frosting doesn't tend to be very stiff.
The most difficult thing about this recipe turned out to be finding Pumpkin Puree... Literally no where stocked it, however I had a nosey online and was very lucky that Waitrose had it in stock. The Cake batter was easy enough to make, I simply had to cream together the butter and sugars, add the eggs one by one, followed by the milk and pumpkin, and finally stir in the flour. One of the things I enjoy most about making cupcakes is that they are so easy to make, all you do is mix the batter and then scoop it into the cupcake liners, I like to use an ice cream scoop to get even amounts in each.
Once these were baked and cooling I moved on to the buttercream icing. This simply involves beating butter until smooth, then slowly adding icing sugar, mixing in between. Once all the icing sugar was incorporated I added cinnamon and vanilla essence. I then seperated a third of the icing into a seperate bowl which I coloured yellow, and then I coloured the majority of the rest orange, to resemble fire. Before adding these to the piping bag I striped some red food colouring in a few places to add further firey accents, and then on one side added the yellow, before filling the rest with the orange. At this point I was honestly praying that this would look like fire!
When I had piped my 'fires' onto each of the cakes I then chopped up some flakes and honeycomb matchmakers to look like different sized and shaped sticks, which I then arranged around my fire to make them look like mini bonfires.
Here's the final result, which I think look pretty sweet in all honesty. They taste so good as well, almost like a carrot cake, but with pumpkin instead.
What have you baked recently?

Pinterest Finds: Halloween Baking Ideas
Monday, 26 October 2015
Happy Halloween week everybody! That's right I am going to be celebrating Halloween for the whole week on the blog with a post a day dedicated to my favourite holiday of the year...
Today's post is all about baking (of course), my workplace is having a Halloween bake off this week, so I thought I should go on over to Pinterest to get some ideas of what I should make and I stumbled across some amazing recipe's that I knew I had to share!
How cute are these mini bite-sized caramel apples that are made by using a melon baller on an apple, putting these little balls on sticks, and then covering them in caramel! These are the perfect treat for Autumn!
I am a massive fan of rice krispie treats, and I have never seen any cuter that these ones, have you?
These voodoo cookies would make a good addition to any Halloween party, just look how creepy they are.
I love little bite-sized treats, especially when they come on sticks, and these little Frankenstein's monster marshmallow bites are perfect!
One of the first things that I learned to bake were truffle bites, so I always have a soft spot for recipes for truffle bites when I see them. These mummy cheesecake bites are just too cute.
How creepy are these cookies, they look like little alien blobs, with a million eyes watching you. Best of all they are brightly coloured, which is something a little different for Halloween.
There is something about eyeballs that I find super creepy, I can never watch a horror film if it has anything to do with eyes, they just creep me out. These fork impaled eyeball treats are the greatest creepy treat.
This cupcakes may look simple, but they are flavoured with cinnamon, which is one of my favourite flavours, especially in the Autumn time.
These toffee apple slices are a new take on the old classic toffee apples, adding another of my favourite things, Chocolate!
There you have some of the best Halloween themed recipes that I found on Pinterest, I literally cannot pick which ones that I want to make first, I think I'm going to have to throw these into a hat and pick at random! If you have any Halloween recipes that you would like to share then please comment below, and Happy Halloween!

Bloggers Bake Along to GBBO: FINAL WEEK: Classically British Cake
Thursday, 15 October 2015
As mentioned in my previous post, I decided to make TWO bakes for the final week, instead of my usual one. This of course meant I set myself far too much work, raised the bar far too high, and ended up getting myself stressed. However something decent actually came out of it!
As soon as I hear the term Classic British Cake, I immediately think Victoria Sponge cake. It's so quintessentially British to me, that I just knew I had to make one. I also didn't just want to make your bog standard sponge cake, so I thought to myself... 'What is the most British thing I can think of in relation to cake?'. The answer of course, was tea... Tea and cakes, afternoon tea, what could be more British. So I set myself the (what I thought was easy) task of making a Teapot Cake! So here's how it all came into being...
As soon as I hear the term Classic British Cake, I immediately think Victoria Sponge cake. It's so quintessentially British to me, that I just knew I had to make one. I also didn't just want to make your bog standard sponge cake, so I thought to myself... 'What is the most British thing I can think of in relation to cake?'. The answer of course, was tea... Tea and cakes, afternoon tea, what could be more British. So I set myself the (what I thought was easy) task of making a Teapot Cake! So here's how it all came into being...
It all started with a sponge. I mixed all the ingredients together in my mixer, and then used some Hemisphere tins that I got from Lakeland to make to half sphere cakes. This was probably the easiest part of the whole process truth be told...
Then I moved onto making a jam... this was the first time I had ever attempted a jam, and considering I didn't have a fancy sugar thermometer I'm pretty happy with how it turned out. I think I'm going to be making this often because it tastes so much better than supermarket cheap jam, and it only took me about 30 minutes to make!
Then I made a simple butter-cream icing which simply involves creaming butter and then slowly bit by bit adding icing sugar. This is probably the simplest of all icings to make, so still didn't run into any issues here!
Then came the putting together of the cake... WOW was this a flipping nightmare. So I crumb coated the sphere halves with the butter-cream icing so that my fondant would stick. and then I made one of the spheres flat on the bottom so it would stand. Then I topped that with butter-cream and jam, before putting the final sphere on top. Next I rolled out my fondant, which I happened to colour myself, which just took such a freaking long time that I wanted to cry. Then the WORST step of all... putting the fondant onto the cake. This was my first time covering a cake with fondant, so picking to do it on a sphere cake was probably a bad move on my part. It just didn't go smoothly... literally. Once I was relatively happy I moved on to the other decoration. So I made a little lid by rolling out white fondant and using a cookie cutter. Then I rolled a small ball for the little lid handle. For some unknown reason I decided to make a polkadot tea pot, so I also spent half an hour piping little dots onto my teapot, before using toothpicks to add a handle, and spout. Finally adding gold accents with a brush and gold edible paint.
There we have it, my classically British victoria sponge cake! I am so happy that it turned out OK, considering the blood, sweat and tears (figuratively) that went into this.
What have you baked this week?

Bloggers Bake Along to GBBO: FINAL WEEK: St. Clements Iced Buns
Sunday, 11 October 2015
The Bake Off is all over, and I am super upset to see it go. There's something about sitting down to watch it each week, and getting excited about baking, that I love. I can honestly say this year has been my favourite bake off, as I have not only been watching, but as you my lovely readers know I have also been baking every week! I remember right bake to my first bake, and I was so worried as to whether I would be able to keep up, and my confidence has just soared since then, and I really feel like I kind of know what I am doing now. So much so that I hope to keep up my one bake a week on my blog, and I hope you will all enjoy reading them.
So onto the final bakes. Originally I decided I was going to make all three of the final challenges, but after I decided what I was going to make for two of them, I just knew I would be setting myself too much work. One bake I knew I couldn't go without making was the iced buns. These have been a favourite of mine ever since I was a kid, I'm used to a plain bun topped with gorgeous water icing, but with my recipe I have gone all out! I decided to go with two of my favourite flavours, orange, and lemon. Hence the name of the bake (I tried so hard to be clever with).
For the bun and icing parts I decided to go with Paul Hollywood's recipe which can be found on the BBC website here.
This involved putting all the ingredients into a bowl and mixing them by hand. We all know how much Mr. Hollywood likes to get his hands dirty. This ended up with my hands being glued to the dough, but with a little extra flour, and a lot of kneading it turned out pretty well! This then had to prove for one hour until doubled in size. Then I had the rather difficult task of shaping my buns... Honestly I blame the cheap Ikea table I was trying to shape them on! Once they are shaped you place them onto a greased baking tray and leave to prove for 40 minutes more. By which time (if you are doing a batch bake) they should be touching. After that all that's left is for them to go in the oven. I was shocked to find they only needed a mere 10 minutes in the oven, until they came out looking brown and lovely, or so I thought! I let these beauties cool, got all nice and ready to decorate them and they were RAW underneath! Never again shall I take the word of Paul Hollywood. So in they went again for another 10 minutes upside down. Low and behold when they came out there were still doughy... Needless to say I was fuming... I don't know exactly how long there were in for in the end, but I kept having to put them back in every time I thought they were done!
Whilst my buns were proving I started making my fillings, starting with one of my all time favourites, Lemon curd. To make this I followed this recipe also from the BBC website. This involves melting butter and sugar into lemon juice and zest over a pan of simmering water. Once this was all melted I then added whisked eggs to the mix, stirring quickly until combined. Then you cook this slowly stirring occasionally until it coats the back of a spoon. Once at this stage simply remove from the heat to leave to cool, and thicken.
Once my curd was out of the way I moved onto a marmalade. When researching a recipe for this I was disheartened to see a tonne of recipes that involved leaving things overnight, as I am impatient and wanted it to be done fast. So I found this recipe for fast marmalade that only takes 20 minutes to cook, and I can confirm it turned out really well. The recipe called for a blender, but as I don't have one I simply zested my oranges, chopped down the flesh as small as possible, and then chopped the skin into strips. All that's left to do is add the sugar and boil the mix. Once boiled for 20 minutes, leave the mix to cool and it begins to thicken!
When the buns were FINALLY done, I moved on to filling and decorating them. I whipped up some cream to go in the middle, and then made up some water icing in Orange and Yellow colours. Then I simply cut the buns in half, spread the filling on, piped on the cream, and carefully (a.k.a messily) placed the water icing on the top. Which as you can see from the photos didn't go so well... I had originally intended to pipe this on, but I only had one piping bag left...
So here's the finished article! I'll admit they aren't the prettiest iced buns I've ever seen, but I have honestly never eaten any tastier ones! The lemon curd is so tart, and just works perfectly in the bun, and the marmalade is just sweet enough to add something new to the classic iced bun. I will definitely be making these again soon, but next time I'll be ignoring Paul Hollywood's directions!
Have you managed to bake anything this week?

Subscribe to:
Posts (Atom)


