 |
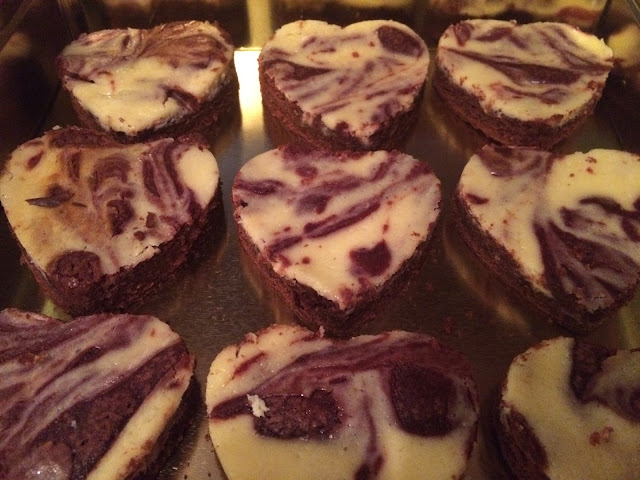
| Beautiful marble effect heart brownies |
It's about time that I got back into baking on this blog, and what better time to start than Valentines Day? I saw this recipe for some beautiful heart shaped Red Velvet Cheesecake Brownies from Kawaiisweetworld on Youtube, and I knew that I had to give them a go. I will admit that I'm not 100% that I got the cheesecake part of this recipe right, but I'll get to that in a minute. You will also require Cup Measures for this particular recipe.
 |
| Ingredients needed for the recipe. |
Ingredients for the Brownie:
- 1 Cup Caster Sugar
- 1 tsp Vanilla Extract
- 1/4 Cup Cocoa Powder
- 1 Stick of Unsalted Butter (113g)
- Pinch of Salt
- Red food Colouring (measurements mentioned below)
- 2 Eggs
- 3/4 Cup of Plain Flour
Ingredints for the Cheesecake:
- 8oz Cream Cheese
- 1/4 Cup of Caster Sugar
- 1/2 tsp Vanilla Extract
- 1 Egg
Special Equipment:
- Cup Measures
- 8" x 8" pan: the one I used was about 8" x 11" so don't worry too much if the one you have is a little bigger
- Heart shaped cutter
 |
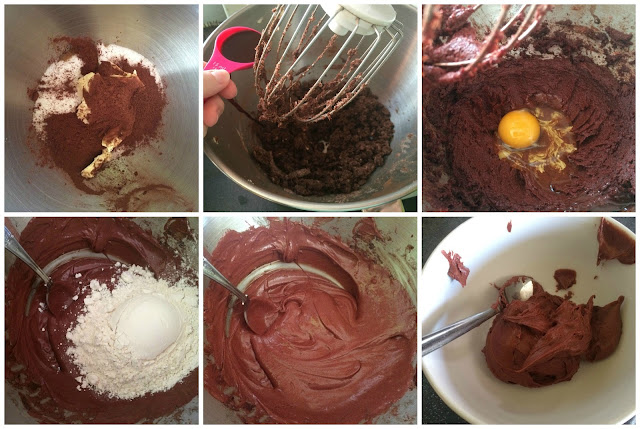
| Brownie making steps. |
We start by preheating the oven to 170 degrees Fan (190 degress/Gas mark 5). Whilst the oven is preheating you will need to grease your tin, for which I used some of the extra butter I had. I then lined the tin with greaseproof paper, which will assist in removing the brownies later.
To get started with the mix, first combine the butter, sugar, vanilla extract, and salt in a bowl, giving them a good mix. Next we add the red food colouring and this is where some guessing work comes in. The recipe I used states to use either 1 tsp of gel food colouring, OR 1 tbsp of liquid colouring. I used a cheap Tesco liquid food colour, and as such ended up using almost 3 tbsp of the food colouring. This is completely up to you, and your own discretion, add colouring until you are happy with the red colour you have gotten with your brownie mix. Once you are happy with the colour, you add your eggs one by one, giving a good mix in between each addition. The last thing to add is the flour, and just mix until completely combined. Then what you want to do is keep back about 1/3 cup of your mixture in a separate bowl for later, this is what we will use for the marbling effect.
 |
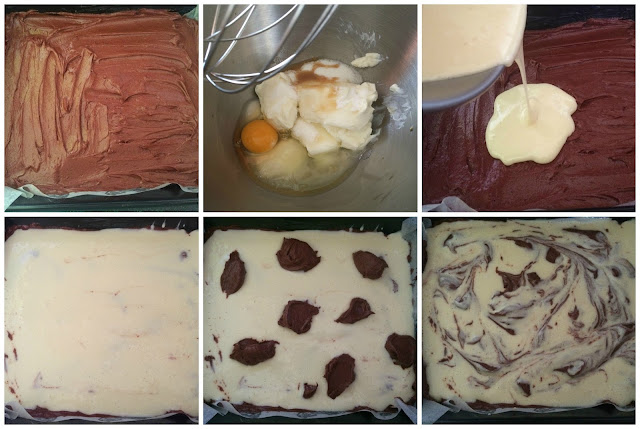
| Cheesecake steps, and brownie assembly. |
I poured the cheesecake mixture over the top of the brownie in the tin, and then smoothed it out over the mixture, making sure it was completely covered. This is when you bring back the mixture that you held back earlier. To make the marble design you simply need to blob the mixture all over the top of the cheesecake then run a knife through it to swirl it around. This was quite difficult as my cheesecake mixture was so runny, I think if the cheesecake mixture was thicker it would have been so much easier.
Then they went off into the oven for 30 minutes. Once they were baked I removed them from the oven and allowed them to cool completely in the tin. The final step once cool, was to cut out my heart shapes. The recipe on the Youtube video states that it should make around 11 heart shaped brownies, I managed to cut 9 out of mine. I think this completely depends on the size of your cookie cutter, I went for a medium sized brownie, but had I made them slightly smaller I think I could have gotten the 11 she mentions in the recipe.


No comments:
Post a Comment